
LEGO Design Philosophy
My work often lives in the gray areas: between recreating known Star Wars ships and creating my own original designs, between brand-new machinery and worn equipment, heroes and villains, and display pieces and toys. I’m drawn to obscure ships, overlooked characters, and the stories not seen on screen.
In this article, I share five principles that guide my LEGO designs, with examples showing how I work within constraints, build stories into small details, make models feel lived-in, combine familiar forms, and design for play.
1. Capture the character within the constraints
You can’t recreate every curve, angle, or detail in LEGO, especially at smaller scales. Available parts, connection geometry, structural requirements, color availability, and cost all shape what’s possible. Sometimes one specific part, often a cockpit canopy, informs the scale of an entire model. Other times, SNOT techniques are necessary to reverse a part’s orientation or produce a shape that was not immediately obvious.
I don’t see those constraints as obstacles, they force creative decisions. My goal isn’t to recreate every detail literally, but to identify the proportions, shapes, and visual details that give a subject its character. Sometimes leaving out certain details allows the overall model to come to life.
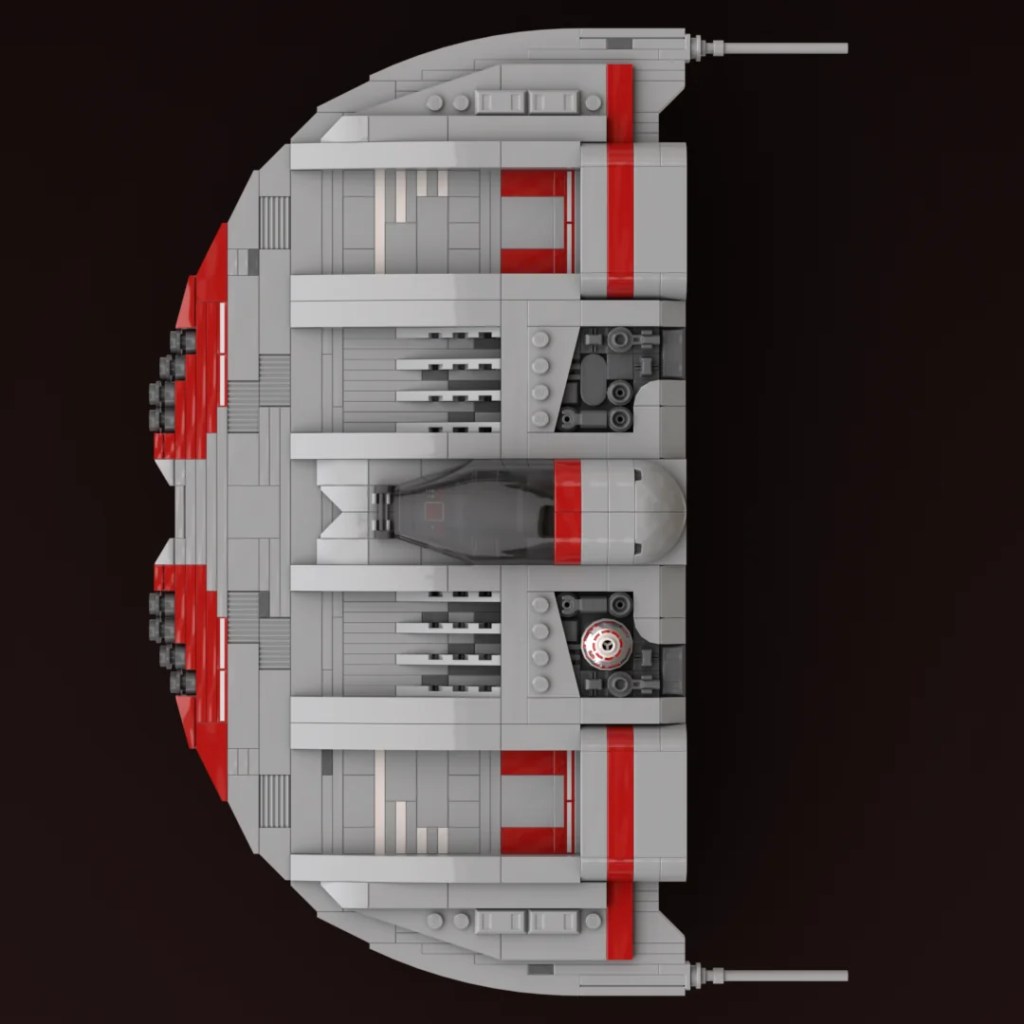
Finding the D-Wing’s shape
My D-Wing’s proportions began with the width of its cockpit canopy. Angled slopes and extensive SNOT construction helped turn that constraint into its semicircular shape. On Patreon, I walk through the design decisions behind the build.
2. Build a story worth discovering
A model or diorama should spark interest at every distance. From across the room, its shape, color, or perhaps lighting should pull you in. As you move closer, the details should begin to reveal what’s happening, who the main character is, and what might have happened just before you arrived.
I also like to reward people who take the time to look. Recreating part of an iconic scene, including a great side character, adding functional details, revealing a fully decorated interior beneath a removable roof, or hiding a small joke can turn viewing into an experience. Each discovery adds another layer to the story.
Telling a story from every side
In “Vader’s Late,” the TIE Advanced draws you in, but the minifigures reveal the trouble. An unhappy Vader confronts an officer up front, while Tag and Bink extend the joke around back. On Patreon, I break down the figure placement, closing-door effect, and wall lighting that bring both scenes together.

Photo by Ben Gebo (bengebo.com)
3. Make it lived-in
I’m drawn to vehicles and environments that show their history. A working ship should have wear and tear, battle scarring, damage from one too many close calls, signs of repair, and mismatched parts. Greebling helps suggest how a ship might actually work, with air intakes, industrial piping, exhausts, and other mechanical details.
Buildings and ground surfaces should feel like they’ve been around a while, with uneven surfaces, cracks and crevices, color changes that suggest age, and vegetation growing wherever it wants to. Carefully placed props such as crates, cables, pipes, and the occasional droid complete a scene. They can make the difference between something looking generically sci-fi and feeling like Star Wars.
The goal is to make it feel like people have used it, depended on it, and kept it running.
Making Shuma’s shop feel lived-in
Wares spill out beneath the awning of Shuma’s cargo-container shop, a multitasking droid assists her, and vegetation creeps around an uneven cobblestone path. On Patreon, I share how these details came together to make the environment feel inhabited.

Photo by Ben Gebo (bengebo.com)
4. Use familiar forms to make something new
The original Star Wars model makers used kitbashing, combining pieces from different commercial model kits to create ships and vehicles that looked unfamiliar but still felt mechanically believable. I take a similar approach in LEGO by borrowing components, shapes, and structural solutions from my prior designs and recombining them into new designs. A cockpit, engine, or wing can suggest that ships came from the same manufacturer or belonged to the same faction.
This approach is especially important in my series of Uglies. In Star Wars, an “Ugly” is the in-universe nickname for a starfighter cobbled together from parts of different ships. The name reflects their mismatched and often awkward appearance. I’ve designed more than 50 Uglies so far.
My “BUT-Yt” combines parts of a B-Wing, U-Wing, TIE Bomber, and YT-1300. Its name also nods to the “But, why?” response some of my more outlandish Uglies receive on social media. These hybrids let me make something original while keeping it connected to the design language of Star Wars.

5. Design for play
LEGO models are meant to be handled and played with, and I want my models to retain that quality. A ship should be sturdy enough to pick up with confidence, swoosh around the room, and set down without falling apart. My cockpits always open to reveal detailed interiors, and most ships include adjustable flight controls, removable landing gear, and hidden storage compartments.
I design similar interactivity into my buildings. Windows have adjustable shutters, doorways slide open, and floors lift away to reveal fully decorated interiors. In “Docking Bay 4,” those rooms include a lobby, shop, and an owner’s quarters with a kitchen and refresher—the Star Wars term for a bathroom. Those are the moments I love: someone leans down to examine a diorama at a LEGO convention, and I remove the ceiling and floors so they can look inside.

Photo by Ben Gebo (bengebo.com)
These principles guide the decisions I make from the first rough shape to the last small detail. The articles below take a closer look at the techniques behind those decisions, from SNOT construction and scale to storytelling.


